8 Best Compost Bins For (Small) Apartments In 2026
This post and the photos within it may contain affiliate links. If you purchase something through the link, I may receive a commission at no extra charge to you.
Looking for the perfect compost bin for your apartment?
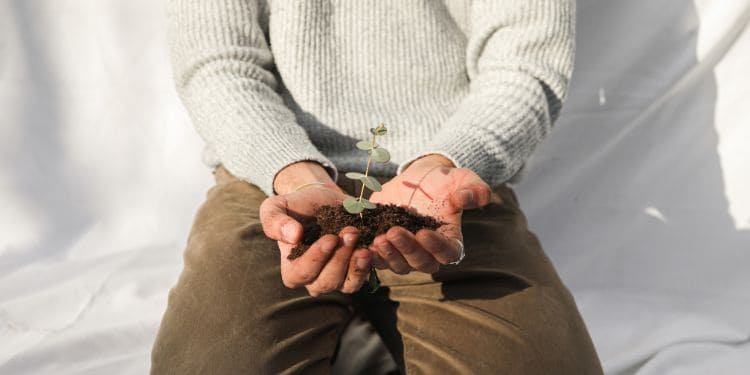
Apartment composting is one of the easiest ways to cut down your food waste and shrink your carbon footprint – even in a tiny space. It’s low-effort, high-impact, and (bonus!) can turn your scraps into rich soil for your plants.
In this guide, I’ll walk you through how to choose the right compost bin for your space and lifestyle. We’ll explore a few different composting methods and break down eight great bins – some for collecting scraps, others for full-on composting from start to finish.
Let’s dive in!
What to look for in an apartment compost bin
Before choosing your bin, consider these key features:
- Ease of use: Look for a bin that’s simple to use, clean, and empty. Fewer moving parts = less hassle.
- Material & durability: Stainless steel and ceramic bins are sturdier and easier to maintain than thin plastic ones.
- Odor control: A good carbon filter (or well-sealed lid) can prevent smells from escaping – no stink, no fruit flies.
- Size & placement: Countertop bins are compact (around 1–1.5 gallons), while systems like a worm or bokashi composters are a bit larger and need more space.
Btw, if new to composting, it won’t be a bad idea to check out and learn all the composting basics & terms before starting!
Grap your FREE composting e-book!
Sign up for my newsletter to unlock the Almost Zero Waste Hub — a free members-only library packed with exclusive guides, e-books & more. You’ll also get Good News Monday, a weekly dose of updates & uplifting stories to keep you inspired and motivated on your sustainable journey.

/pat
8 compost bins for apartments
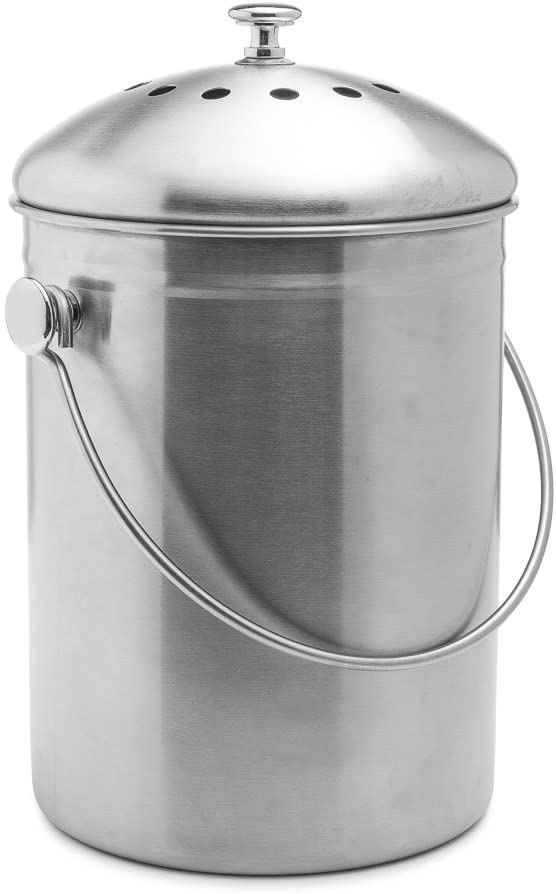
1. Epica Countertop Compost Bin
A sleek, no-fuss countertop option with a strong build and odor-absorbing charcoal filter. It’s easy to clean, rust-resistant, and holds about 1.3 gallons – perfect for a few days’ worth of scraps.
Best for: Beginners & small households
Capacity: 1.3 gallons
Good to know: No inner liner = fewer parts to clean + it has a build filter
Type: Scrap collector (does not compost)
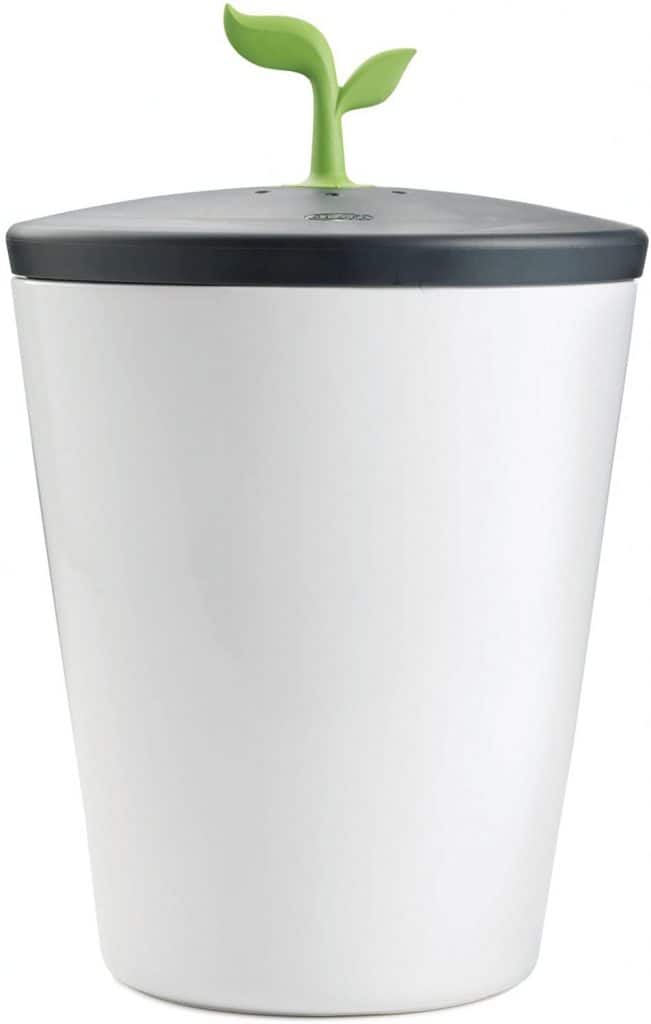
2. EcoCrock Counter Compost Bin
This ceramic bin has a removable plastic liner, making it easy to empty and clean, and it includes two replaceable charcoal filters to keep odors at bay.
Best for: If you want a simple bin with an inner bucket
Capacity: About 1 gallon
Good to know: Ceramic is dishwasher safe; wash plastic liner by hand
Capacity: ~1 gallon
Type: Scrap collector
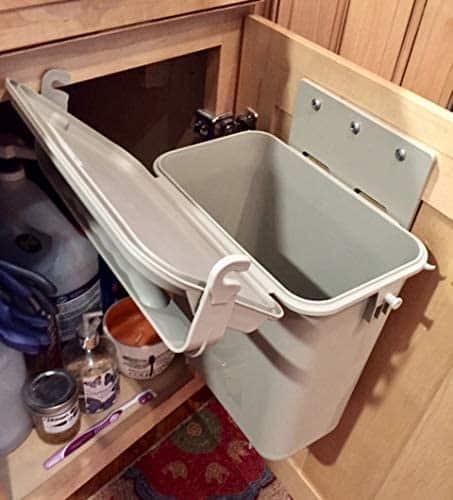
3. Under-Counter Compost Bin by YukChuk
This discreet, under-the-sink option mounts to the inside of a cabinet. No filters are needed, no smell, and no flies.
Best for: Those who want a discreet bin that stays out of sight
Good to know: Made of plastic but durable with proper care
Capacity: 1.5 gallons
Type: Scrap collector
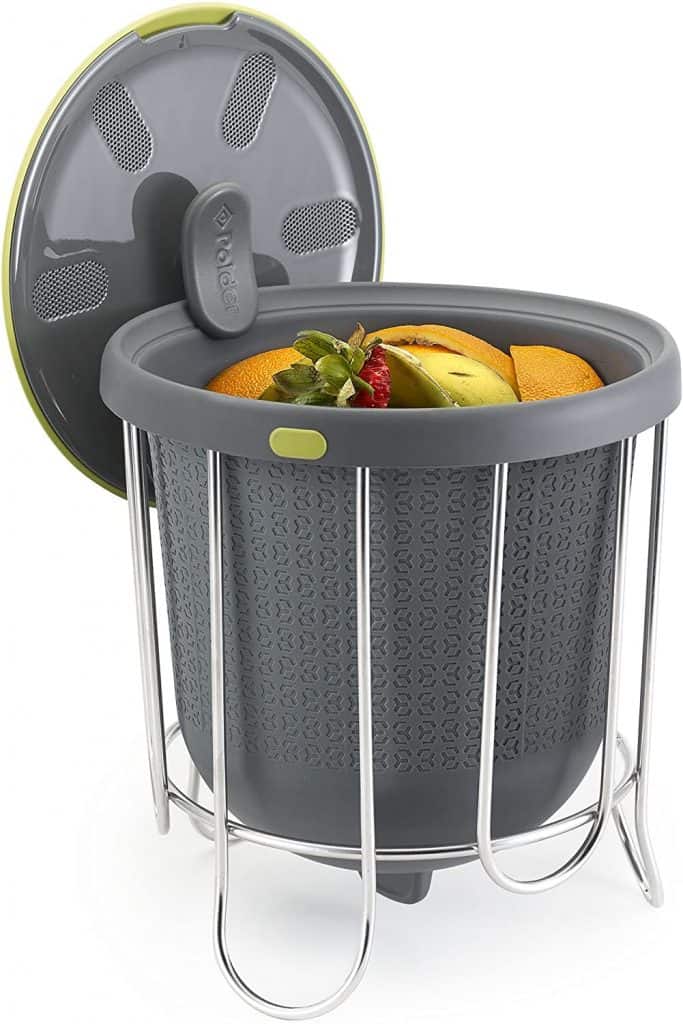
4. Polder Kitchen Composter
Made from sturdy silicone, this compact bin is dishwasher-safe and has an adjustable vent to control airflow and odors.
Best for: Minimal mess, easy cleaning, for freezing scraps
Good to know: Can go in the freezer; metal parts may show rust over time
Capacity: 1 gallon
Type: Scrap collector
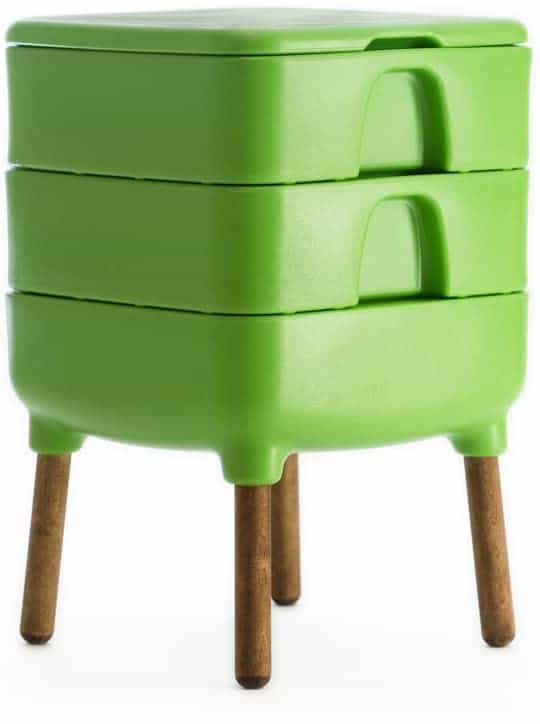
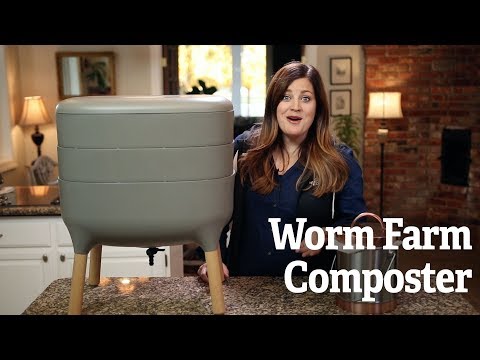
5. Hot Frog Living Composter
Enter the world of vermicomposting! This compact worm bin comes with stacking trays, a tight-fitting lid, and a spigot to collect compost tea. Great for balconies or utility closets.
Best for: A hands-on, fun, efficient way to compost
Good to know: Needs a balance of food scraps (greens) & bedding (browns)
Capacity: Moderate, expandable with trays
Type: Full compost system (vermicomposting)
Check an overview of the Worm Farm Composter from Laura from the Garden Answer Channel:
Related post: Vermicomposting: Step-by-step guide
6. Worm Factory 360
Another excellent worm composting setup. This one comes with 3+ trays and a detailed digital manual for beginners. Just like the Hot Frog, it turns scraps into rich worm castings.
Best for: Beginners who want to start vermicomposting with structure
Good to know: Expands up to 7 trays if your composting needs grow over time
Capacity: Moderate to large (expandable)
Type: Full compost system (vermicomposting)

7. Sunwood Life Bokashi Compost Kit
This fermentation-style bin uses bran and microbes to break down food scraps. It takes about 2 weeks to ferment, then you bury it in the soil to finish decomposing. Super low-odor, compact, and efficient.
Best for: Small spaces, composting more types of food (cooked, meat, dairy, etc)
Good to know: Requires burying the fermented waste after 2 weeks
Capacity: ~5 gallons
Type: Full compost system (Bokashi fermentation)

Related post: Detailed Bokashi Compost Guide
8. FoodCycler by Vitamix
A high-tech composting machine that breaks down food waste in just a few hours using heat and grinding. The result is a dry, odorless fertilizer you can mix into soil. It’s fast, clean, and great for people with little space.
Best for: People with no outdoor space or who want fast results
Capacity: ~2L per cycle
Type: Electric composter (dehydrator)
Good to know: Odor-free and low-maintenance, but higher upfront cost

It works like this:

Final tips
Start small & adjust: If you’re unsure which method to choose, start with a simple scrap collector. You can upgrade later to something that breaks down the food too.
Keep it dry(ish): To avoid smells and pests, add dry material like shredded paper, napkins, or sawdust to balance wet scraps.
Freeze scraps: If you’re short on space or worried about odor, freeze your scraps until you’re ready to compost or drop them off.
Rinse weekly: Whether it’s a bin with a liner or not, give it a regular clean to keep things fresh and gnat-free.
Know what’s compostable: Choose your preferred composting method, and find out what you can & cannot compost. Double-check if things like tea bags or bioplastics are truly compostable in your setup.
FAQs
What if my compost smells bad?
Bad odors usually mean too many wet “greens” (like food scraps) without enough dry “browns” (like shredded paper). Add some dry material and give it a stir or mix. If your bin has a filter, check if it needs replacing.
What if I get fruit flies or gnats?
Annoying but fixable! First, empty and rinse your bin more often. You can also sprinkle a few drops of peppermint or eucalyptus oil on the lid or filter. If it’s really bad, keep scraps in the freezer until drop-off or compost day.
Can I compost cooked food or meat?
Only in specific systems like Bokashi or electric composters. Standard bins and worm setups can’t handle these well – they’ll attract pests or smell.
What’s the difference between a scrap collector and a compost bin?
A collector stores your food scraps until you can compost them. A compost bin (like a worm bin, Bokashi, or FoodCycler) actually breaks down the scraps into soil or fertilizer.
Where do I drop off my food scraps if I don’t compost at home?
Many cities have drop-off programs at local farmers markets, community gardens, or municipal compost hubs. You can also check ShareWaste.com to find neighbors or groups collecting scraps near you. For more ideas, you can get my free e-book on composting here.
I don’t have a balcony — can I still compost?
Yes! Worm bins and Bokashi buckets are great indoor options. If you just want to collect scraps, keep them in a countertop bin or freezer until drop-off.

Wrap up
There’s no one-size-fits-all when it comes to composting – especially in an apartment. But hopefully, this list helped you find a setup that works for your space and lifestyle.
Still unsure which method fits you best? Start with this: Apartment Composting: 5 Easy Methods. It walks through the pros, cons, and step-by-step instructions for each composting style.
And if you’ve found a bin that works great (or didn’t), let me know in the comments – I’d love to hear!