Apartment Composting: 5 Easy Methods
This post and the photos within it may contain affiliate links. If you purchase something through the link, I may receive a commission at no extra charge to you.
Apartment composting – is it doable?
Composting indoors is entirely doable, even without a backyard. With a little planning and the right tools, you can compost in your apartment, cut down on trash, and give back to the earth!
In this guide, I’ll cover 5 simple methods, including step-by-step instructions for each. You’ll learn what you need, how to get started, and the benefits of each. Let’s dive in!
Table of contents:
Grap your FREE composting e-book!
Sign up for my newsletter to unlock the Almost Zero Waste Hub — a free members-only library packed with exclusive guides, e-books & more. You’ll also get Good News Monday, a weekly dose of updates & uplifting stories to keep you inspired and motivated on your sustainable journey.

/pat
Why compost in an apartment?
Composting reduces landfill waste, nurtures your plants, and supports a cleaner environment. Plus, it’s an easy and practical way to handle food scraps when you don’t have a yard. When you compost, you’re:
- Reducing waste and lowering methane emissions in landfills. Btw, did you know that 36 times more potent than CO2 at trapping heat in the atmosphere? Yuiks.
- Creating nutrient-rich compost that can be used in your plants or garden.
- Saving money on store-bought fertilizers.
- Contributing to a sustainable, low-waste lifestyle.
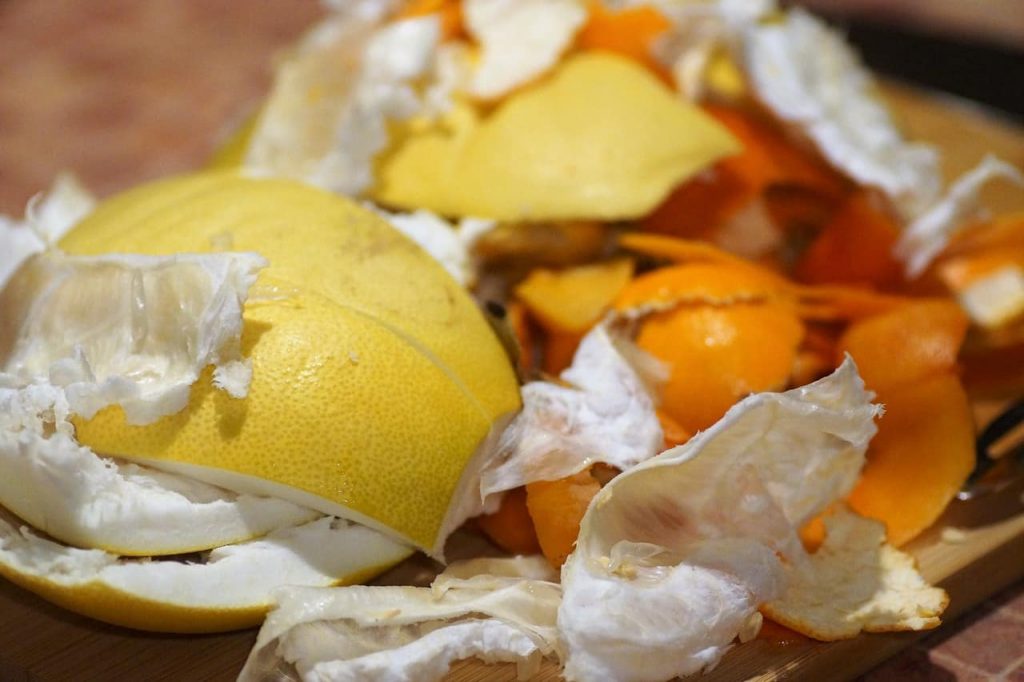
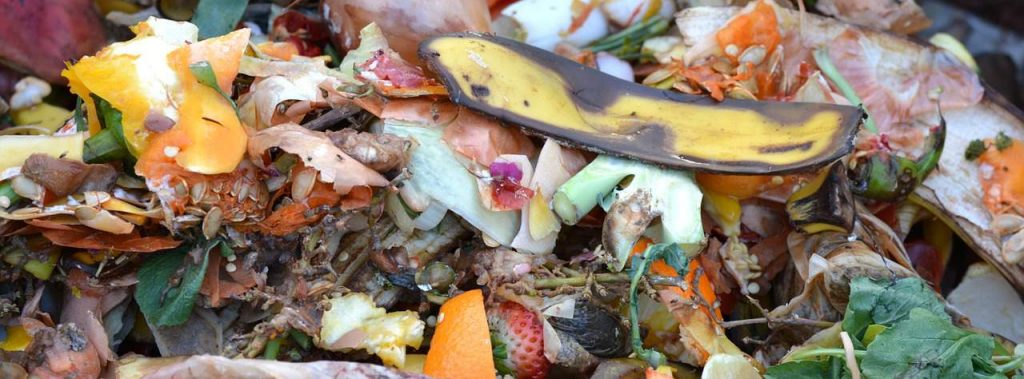
What you can & can’t compost indoors
| ✅ Compostable items: | ❌ Not compostable: |
| Fruit & veggie scraps | Meat, dairy, and bones (with some exceptions) |
| Coffee grounds, filters, and (plastic-free) tea bags | Oily and greasy foods |
| Grains, pasta, bread, eggshells | Pet waste |
| Paper, cardboard, and shredded newspaper | Moldy stuff |
| Hair, fur, and natural fibers | Diseased plants |
| Houseplants & dried flowers | Charcoal |
| Sawdust, hay, wood chips | Coal ash |
| Leaves and yard trimmings | Chemically treated yard waste |
5 apartment-friendly composting methods:
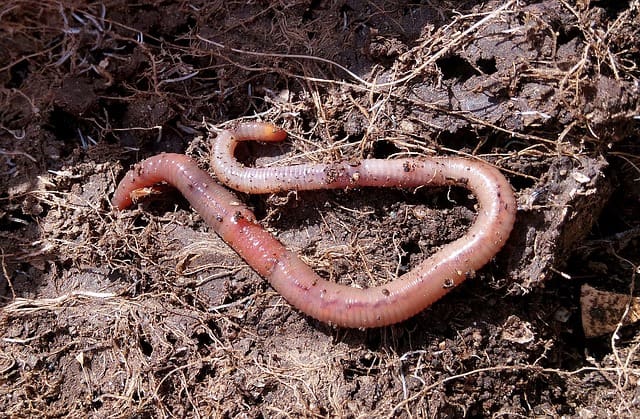
1. Vermicomposting (worm bin)
Vermicomposting uses worms to break down food scraps into rich compost. It’s one of the most popular indoor composting methods, especially for apartments, because it’s low-maintenance and doesn’t require a lot of space.
What you’ll need to start:
- Worm bin or container
- Red Wiggler worms
- Shredded newspaper, cardboard, or coconut coir for bedding
- Food scraps (fruit and vegetable peels, coffee grounds, etc.)
- Water to keep the bedding moist
Step-by-step guide for vermicomposting:
- Step 1: Choose a worm bin. You can buy a ready-made worm bin; great options include: the 2-tray vermicomposter bin, Worm Factory 360, or 5-tray worm composter, or DIY it – use plastic containers with holes for ventilation and drainage.
- Step 2: Get red Wigglers. These are the best composting worms. You’ll need about 1–2 pounds. If you start with 1 lb (453g), feed them about 0.5 lb (226g) of food scraps per day to avoid overfeeding.
- Step 3: Prepare bedding: Tear newspaper or cardboard into strips and soak them in water. The bedding should be moist like a wrung-out sponge—never soggy. You can also use materials like egg cartons, straws, sawdust, or fallen leaves.
- Step 4: Add food scraps. Start with small amounts of chopped fruit and vegetable scraps. Bury the scraps under bedding to reduce smells and fruit flies.
- Step 5: Maintain the bin. Keep it in a cool, shaded indoor spot. Check moisture and add more bedding if things get too wet. Stir gently once a week if needed.
- Step 6: Harvest the compost. Every few months, dark, crumbly compost will be ready. You can either: Move worms to one side of the bin and harvest from the other, or relocate worms to a fresh bin and collect the finished compost.
Tips:
- Keep your worm bin in a cool, dark place like under the kitchen sink or in a basement.
- Always maintain a balance of green (food scraps) and brown (paper, leaves) materials. Too much green material can cause odors and attract pests.
- Avoid feeding worms too much at once. Feed them small amounts to allow them to break down the material.
- Ensure your bedding is moist but not soaking wet. Add water as needed to keep it damp, not soggy.
- Keep the bin between 55°F and 77°F. Too hot or too cold will harm the worms.
Pros:
- Minimal odor
- Doesn’t require a lot of space
- Great for kitchen scraps
Cons:
- Needs a dark, cool place to thrive
- Requires regular attention and care for the worms
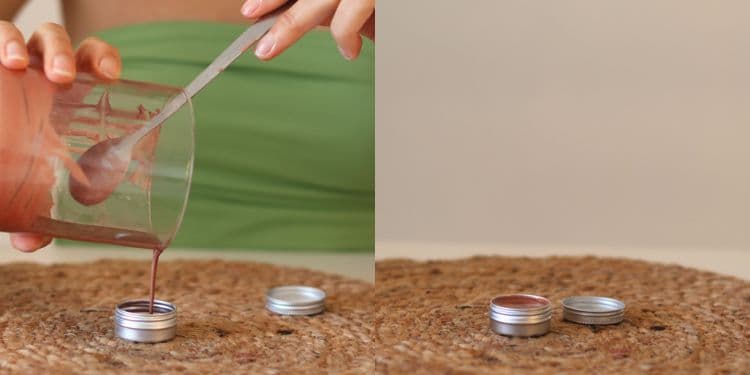
2. Bokashi composting (fermentation system)
Bokashi composting is a unique method that ferments food scraps, including meat, dairy, and cooked foods, which are usually not suitable for regular composting. After 2-3 weeks of fermentation, the pre-compost can be buried in soil or added to an outdoor compost system to finish breaking down.
What you’ll need to start:
- Bokashi bin (airtight with a spigot)
- Bokashi bran (fermentation starter), or learn how to make DIY Bokashi bran here
- A warm, dark space for fermentation
You can buy a Bokashi starter kit (container + bran) or a more full Bokashi kit here.
Step-by-step guide for Bokashi composting:
- Get a Bokashi bin: This is an airtight bin that you can find online or in stores. It should come with a spigot to drain off any liquid (called leachate).
- Add Bokashi bran: Bokashi bran is a special mix of microorganisms that aid in the fermentation process. You’ll sprinkle a layer of the bran at the bottom of the bin.
- Add food scraps: Layer food scraps in the bin, adding a little more bran on top of each layer. Press down to remove air pockets.
- Seal the bin: Once it’s full, seal the bin and let it ferment for about two weeks. The fermentation process should occur in a dark, warm place.
- After fermentation: Once the compost is fermented, you can either bury it in your garden (it’ll break down quickly in soil) or add it to a traditional composting pile.
Tips:
- After filling your Bokashi bin, let it ferment for about 1-2 weeks. Then, let the compost rest for another 2 weeks to fully complete the process.
- Be sure to layer your kitchen scraps with Bokashi bran to prevent odors and mold. Add the bran after each food scrap layer.
- Ensure your bin isn’t too wet. Drain off any excess liquid daily, as it may become too soupy and smell bad.
- Keep your Bokashi bin in a dark, cool place, like a cupboard or pantry, away from direct sunlight.
Pros:
- Accepts a wide variety of food scraps (including meat and dairy)
- Fast and efficient
- Minimal odor during fermentation
Cons:
- Requires a second composting step (burying or adding to a traditional compost pile)
- Needs to be stored in a warm, dark place

3. Compost tumblers (outdoor method)
If you have access to a small balcony, patio, or even a sunny corner outdoors, a compost tumbler is an excellent, low-maintenance option for composting your kitchen scraps. Unlike traditional compost piles or bins, tumblers are fully enclosed and mounted on a frame, which makes them easy to rotate – helping to aerate the contents and accelerate the composting process.
Miracle-Gro Small Composter is ideal for patios or balconies and has a capacity of 27.7 gallons (105 liters). Its compact footprint doesn’t take up much space, and the single-chamber design is simple to use and great for beginners.
What you’ll need to start:
- Compost tumbler
- Food scraps (fruit and vegetable scraps, coffee grounds, etc.)
- Access to a small outdoor space (e.g., balcony or patio)
Step-by-step guide for compost tumblers:
- Set up a compost tumbler: Choose a tumbler that fits your space and budget.
- Add food scraps: Add fruit peels, veggie scraps, coffee grounds, and other compostable materials.
- Turn the tumbler: Rotate the tumbler every few days to aerate the compost and speed up decomposition.
- Harvest the compost: In about 2-3 weeks, your compost should be ready to use in your garden or for houseplants.
Tips:
- Rotate your tumbler every few days to mix the compost. This helps aerate the pile and speeds up decomposition.
- Use a mix of “greens” (kitchen scraps) and “browns” (dry leaves, cardboard) to maintain the right carbon-to-nitrogen ratio.
- Keep your compost moist but not wet. Add water if it looks dry or add dry materials if it’s too wet.
- Place your tumbler on a level surface to ensure proper drainage and airflow.
Pros:
- Fast decomposition
- Minimal odor and pest issues
Cons:
- Needs regular turning
- Requires outdoor space
4. Electric composters
If you’re looking for a fast, low-effort method, electric composters like the Lomi or Vitamix FoodCycler might be your best bet. These units break down food scraps into nutrient-rich material in just a few hours. Here’s a quick list of some of the most common electric composters for home use:
What you’ll need to start:
- Electric composter (e.g., Lomi or Vitamix FoodCycler)
- Food scraps (fruit peels, coffee grounds, etc.)
- Power source
Step-by-step guide for electric composting:
- Purchase an electric composter: Choose a countertop model that suits your budget and needs.
- Add scraps: Place food scraps like fruit peels, coffee grounds, and veggie scraps into the composter.
- Set the machine: Turn on the machine and let it process the scraps. Most units have different modes for composting, depending on how fine or dry you want the final product.
- Harvest the compost: After the cycle finishes, the machine will produce a dried, ground-up version of the scraps. You can use this for your indoor plants or add it to your garden.
Tips:
- Some electric composters are sensitive to large bones, dairy, and oils. Always check the manufacturer’s guidelines.
- Clean the machine every couple of weeks to prevent odor and build-up.
- Electric composters offer fast results, typically in under 24 hours. Ensure you’re using the machine regularly to prevent food scraps from piling up.
- After the cycle, consider leaving the compost to dry out a bit before use. This helps it break down further and improves its texture.
Pros:
- Fast composting
- No need to deal with pests or odors
- Minimal effort required
Cons:
- Doesn’t technically “compost,” but produces a similar end product
- High upfront cost
5. Pre-composting & collection methods
If you don’t want to actively compost indoors but still want to minimize waste, you can use pre-composting methods to collect food scraps until you’re ready to dispose of them.
What you’ll need to start:
Countertop collection:
- Kitchen compost bin with a charcoal filter
- Food scraps (fruit and vegetable scraps, coffee grounds, etc.)
- A local composting facility or curbside pickup service
- Countertop compost bin pick: Epica bin or Lalastar bin
Blender composting:
- Powerful blender
- Food scraps
- Water
- A compost pile or garden bed
- Blender compost bin pick: Oxo bin
Freezer composting:
- Freezer-safe container
- Food scraps
- A local composting facility or curbside pickup service
- Freezer compost bin pick: Airnex collapsible bin or Full Circle freezer bin
Step-by-step guide for pre-composting & collection:
- Countertop collection:
- Get a kitchen compost bin: A countertop compost bin with a charcoal filter will help contain odors.
- Collect scraps: Place fruit peels, vegetable trimmings, and other compostable scraps in the bin.
- Empty regularly: You can drop the collected scraps off at a local composting site or arrange for curbside compost pickup.
- Blender composting:
- Blend scraps: Blend food scraps with a little water to create a slurry.
- Compost outdoors: Add the slurry directly to your outdoor compost pile or garden bed to speed up decomposition.
- Freezer composting:
- Store scraps in the freezer: Place food scraps in a freezer-safe container and freeze them until you can take them to a composting facility.
- Drop off at a facility: Find a local composting facility that accepts frozen food scraps or use a curbside pickup service.
Pros:
- Minimal space required
- Easy and odor-free
Cons:
- Only works for people who can access composting services
- Requires local compost facilities or pickup service
TL;DR – Comparison table
Here’s a quick table comparing the 5 apartment-friendly composting methods – covering space needed, composting time, and key pros and cons – so you can find the one that fits your lifestyle best:
| Method | Space needed | Time to compost | Pros | Cons |
|---|---|---|---|---|
| Vermicompost | Small (indoor) | 2–3 months | Low odor, compact, low maintenance | Needs worm care, no meat/dairy |
| Bokashi | Very small | 2–4 weeks (ferment) + bury | Handles all food, no smell indoors | Requires post-fermentation burying |
| Compost tumbler | Small balcony/patio | 1–3 months | Easy to turn, faster than static bins | Needs outdoor space, can be bulky |
| Electric composter | Countertop | Hours to days | Fast, odor-free, minimal effort | Expensive, uses electricity |
| Pre-composting | Very small | N/A (for drop-off) | Easy, no composting required | Needs access to drop-off or service |
Download my FREE eBook! 🌿
Wanna dive deeper? I created a free e-book on composting, that includes a detailed breakdown of each method, plus tips, troubleshooting, and expert advice on apartment composting. It’s available for free at the Almost Zero Waste Hub member’s area.
Grap your FREE composting e-book!
Sign up for my newsletter to unlock the Almost Zero Waste Hub — a free members-only library packed with exclusive guides, e-books & more. You’ll also get Good News Monday, a weekly dose of updates & uplifting stories to keep you inspired and motivated on your sustainable journey.
/pat
Final thoughts
Composting indoors is a sustainable and easy way to manage food scraps while living in an apartment.
Whether you choose a worm bin, Bokashi system, or electric composter, there’s a method that fits your space and lifestyle.
Don’t forget – composting doesn’t have to be complicated. Start small, and experiment to find what works best for you!


I live on a farm and have always composted. My compost “bin” consists of a chain link fence. I made a 5×5 foot square with a gate. The fence is 6 feet tall.
I lined it with about 4 inches of autumn leaves. Then, a single layer of compostables. Another layer of leaves. Repeat. If the weather was quite dry, I spray it with the garden hose…lightly.
On and on I go for a year. THEN! When it’s time to plant my garden, I carefully open the gate and shovel soil from the bottom. By the time a year has passed, all the bottom half is decomposed and turning to dirt. So easy. And if it ever gets stinky or anything, you take a shovel and turn the top 12 inches over and let it get some sun so it dries a bit. If you have a serious emergency and need some help, you can sprinkle a box of rid ex over the top and water it, before covering with a leaf layer. Happy composting!
Hi Brenda. 🙂 This is so cool, thank you so much for sharing your process!