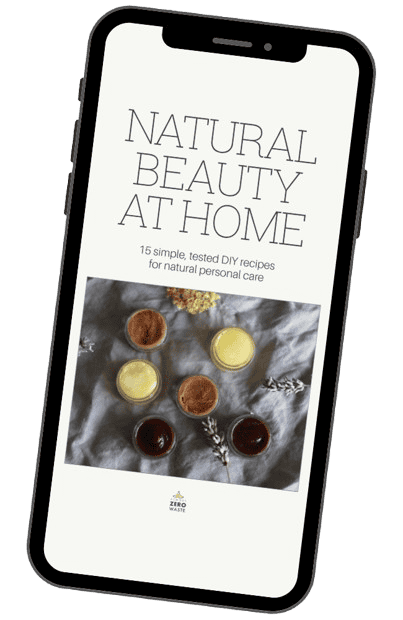
DIY Whipped Body Butter Recipe (Non-Greasy)
This post and the photos within it may contain affiliate links. If you purchase something through the link, I may receive a commission at no extra charge to you.
How to make simple, non-oily & moisturizing whipped body butter at home?
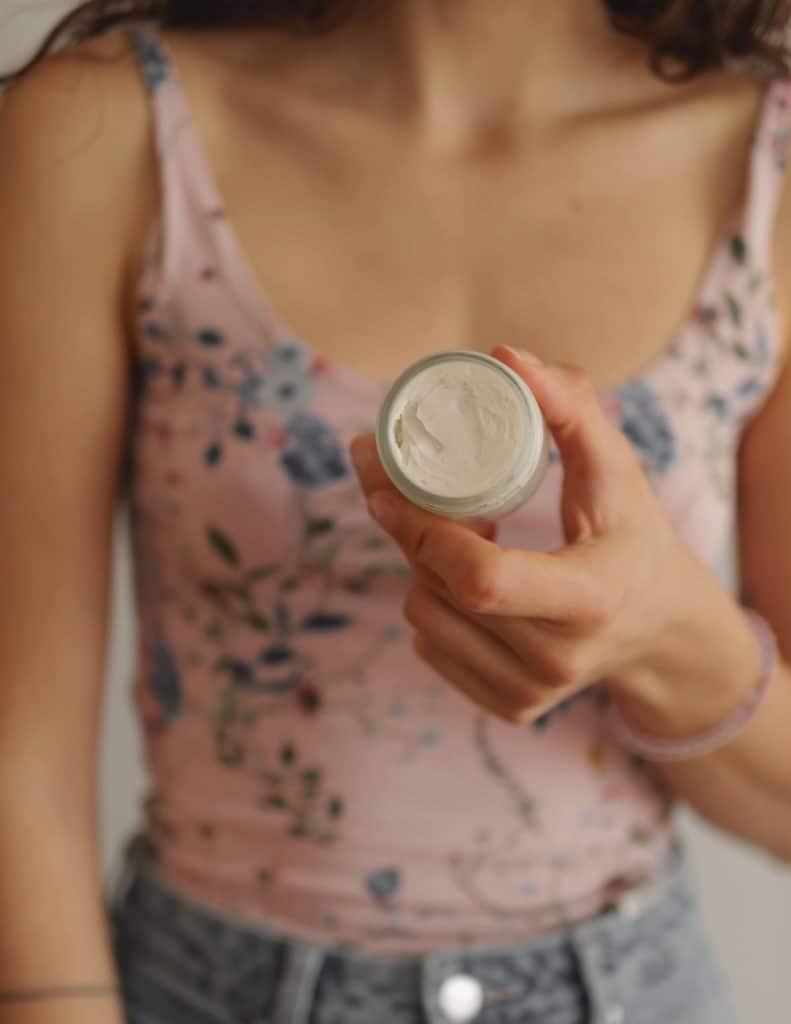
I’m excited to share my easy recipe for deliciously smelling & non-greasy homemade body butter!
After some trial and error, I discovered the perfect combination for an incredible whipped shea butter that absorbs quickly and leaves your skin feeling amazing.

Body butter VS lotion: The difference
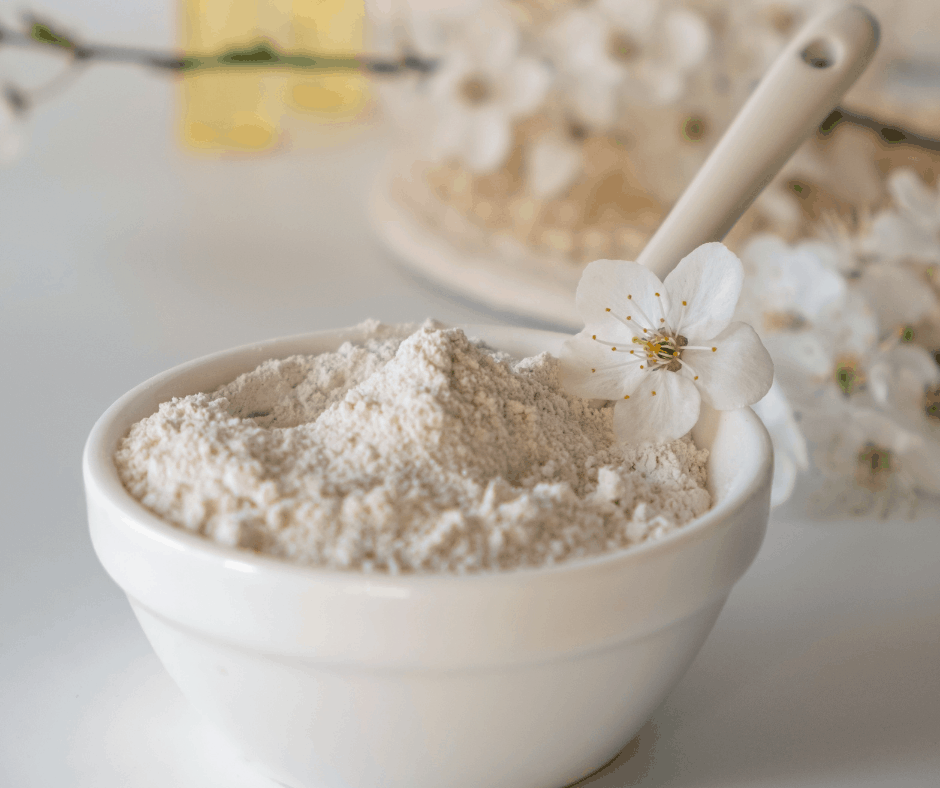
Body butter is a nutrient-dense thick cream made of natural oils and butter designed to hydrate and nourish your skin.
It is more concentrated than a lotion, and because body butter contains no water, it isn’t prone to microbial growth and has a longer shelf life.
While it takes longer to penetrate the skin, it can soften very dry and rough spots like the knees, elbows, and feet. By whipping it, the body butter will become soft, fluffy, and easy to apply.
Benefits of DIY body butter
Some fantastic benefits of the homemade body butter include:
- Moisturizes, smoothes, and regenerates your skin
- Forms a protective barrier that helps keep moisture from leaving your skin
- Nourishes your skin with vitamins and antioxidants
- It may reduce the appearance of scars
- It is affordable & customizable
Make your own natural beauty without the waste
This is for you if you want…
- natural alternatives that actually work
- practical swaps that fit into real life
- fewer unnecessary ingredients
- a simple low waste routine
57 pages · 15 recipes · Includes printable cheat sheet
Ingredients & substitutions
*I will give you substitutes you can use, but keep in mind that swapping any of the main ingredients may impact the final result.*
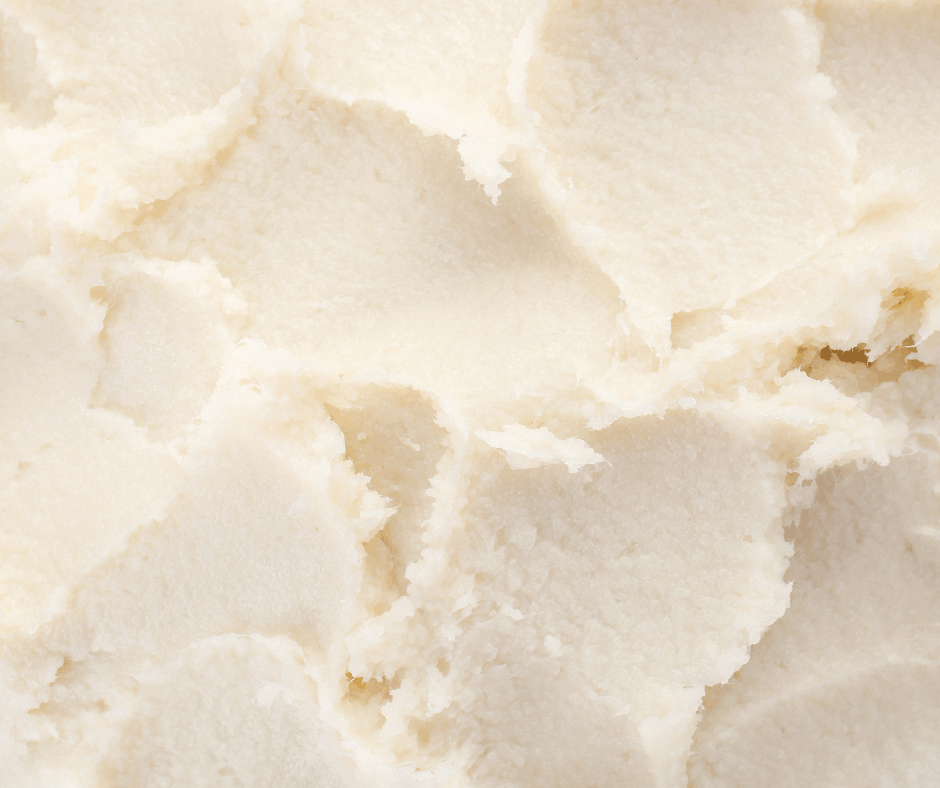
Shea butter
Shea butter softens and hydrates skin. It is anti-inflammatory, packed with antioxidants, and ideal for all skin types, from regular to dry. It won’t make your skin look oily after applying it; it quickly soaks up into your skin and creates a moisture-sealing barrier.
Furthermore, shea butter is one of the reasons why the whipped shea butter may help reduce the appearance of stretch marks and scarring. I prefer using refined shea butter because there is no grainy feeling in the end product.
Alternative: Mango butter, suitable for normal or dry skin. It will change the texture of the recipe, and it will be more solid.

Cacao butter
Cacao butter is high in antioxidants, and it has a positive impact on skin health. It is high in fatty acids and hydrates the skin deeply while being noted to help skin irritations, eczema, and even scarred skin.
The top layer of the skin absorbs cacao butter quickly. It can also improve skin elasticity and reduce wrinkles. It is perfect for dry skin.
Alternative: Kokum butter is highly moisturizing, without clogging the pores, and helps heal dry and cracked skin. However, it is drier than cacao and flakier, so it may change the consistency of the body butter.


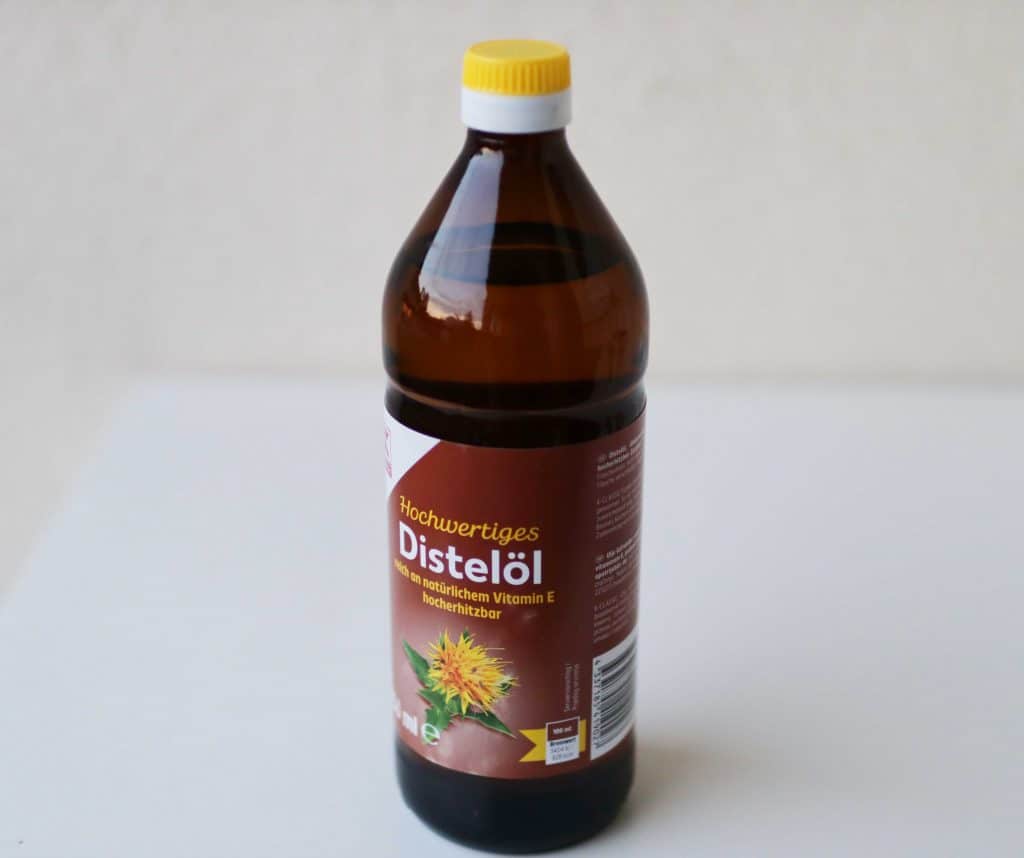
Safflower oil
Safflower oil is excellent for sensitive skin, and it has anti-inflammatory properties. In addition, it stabilizes the health of the skin barrier and keeps inflammation and irritation away. Safflower oil is a fast-absorbing oil, suitable for normal or oily skin, with a comedogenic rating of 0.
Note: Safflower oil has two versions – for cooking and a second (safflower essential oil) used as a carrier oil. The one for cooking will work fine (is what I used).
Alternative: Grapeseed oil is another fast-absorbing option, great for sensitive and oily skin. For more fast-absorbing oil alternatives, check below.
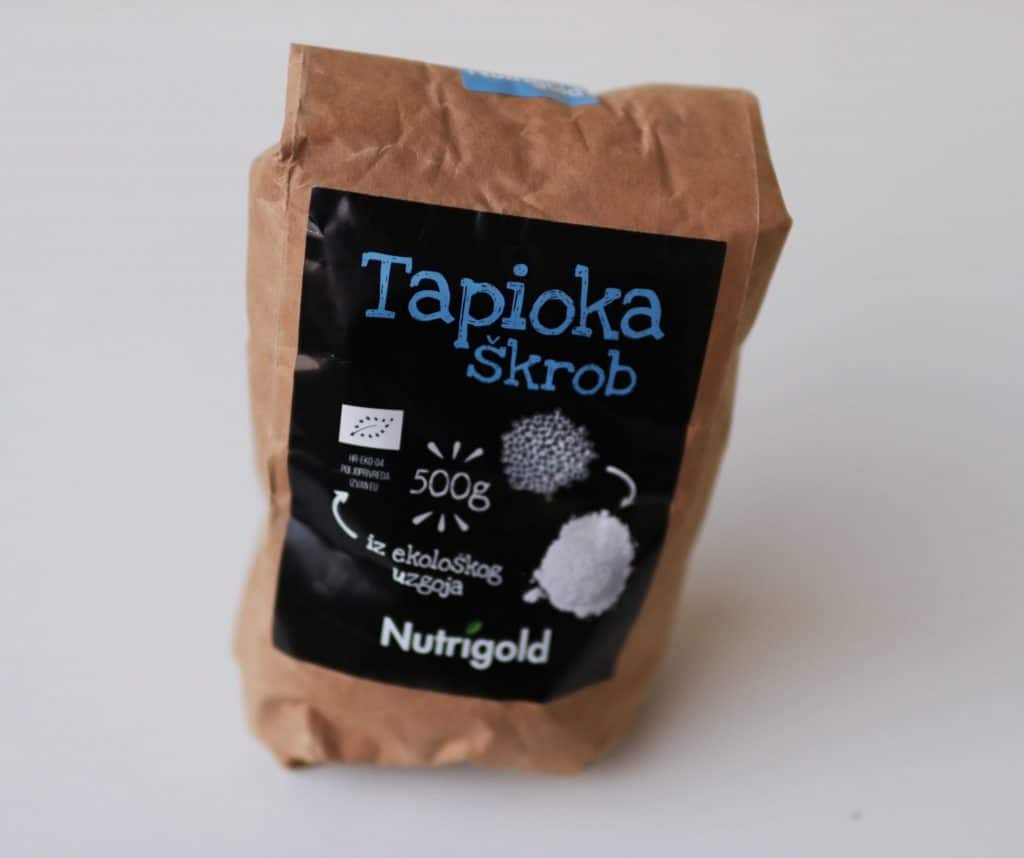
Tapioca starch
It can help thicken the homemade body butter, and it is an excellent oil-absorbing agent.
Alternative: Arrowroot powder or cornstarch.
Kaolin clay
Clay minerals are used as active principles in cosmetics, due to their high absorbency level of substances such as greases, toxins, etc. (1) This makes kaolin clay a great addition since it can naturally remove or absorb oils, secretions, and contaminants from the skin. (1) It is also ideal for sensitive skin.
Alternative: Bentonite clay is another option that should work.

Essential oil
For this DIY, I used vanilla fragrance oil that promotes relaxation and it just smells great. Other great essential oils for this recipe include:
- Lavender or chamomile essential oil – Soothing and relaxing. Suitable for dry skin.
- Cinnamon or rosemary essential oil – Both are anti-inflammatory and can keep excess sebum away, making them a good option for acne-prone skin.
- Peppermint essential oil – It has a cooling effect on the body and can relieve tension, muscle, and joint discomfort.
- Rose or frankincense essential oil – Frankincense helps relieve oily and acne-prone skin while helping reduce wrinkles, fine lines, and age spots. Rose promotes skin cell turnover, making it great for mature skin and anti-aging.
Essential oils notes:
- I recommend avoiding citrus oils since they are photosensitive. This means that when you topically apply some citrus oils, they can cause skin irritation to UV light (itching, redness, burning, etc).
- Make sure you get 100% pure, certified organic (if possible) therapeutic-grade essential oils. Always check the label for the Botanical name, plant part, country of origin, and expiration date.
Important:
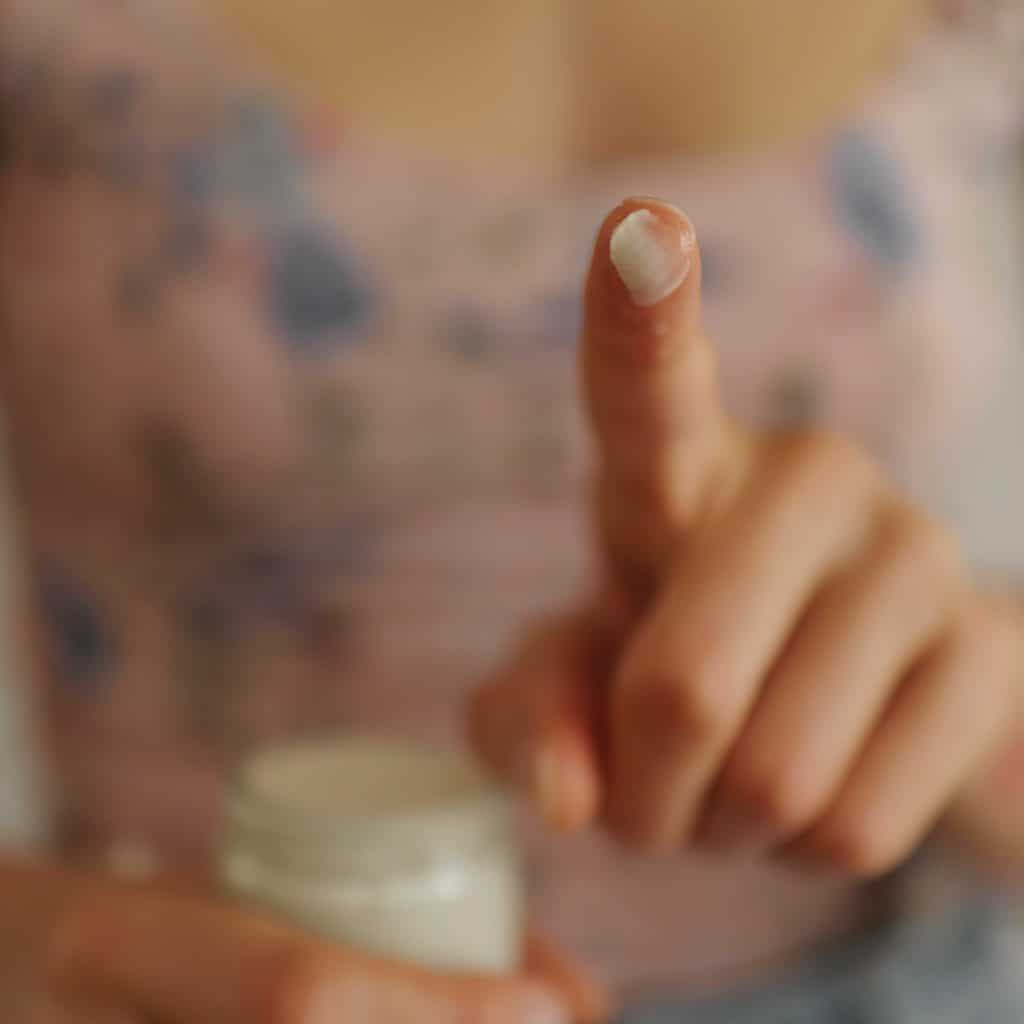
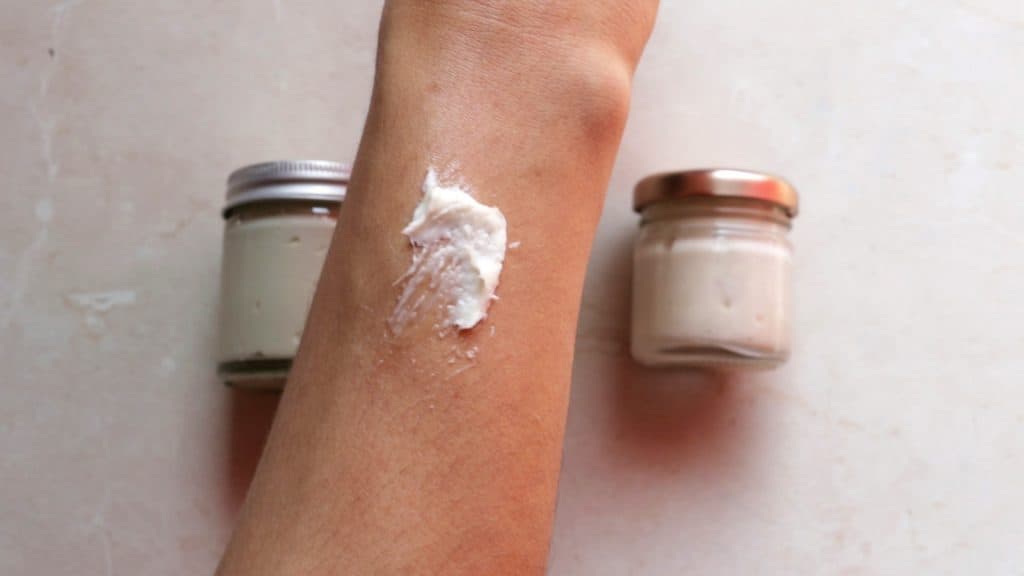
Before using any DIY product, it is a good idea to perform a patch test to ensure your skin won’t react negatively to an ingredient. To do a patch test:
- Apply a little bit of the product/ingredient you want to use on your inner forearm. Wait for 24 hours. You can also cover the area with a bandage.
- After 24 hours, check the skin. If there’s no sign of hives, redness, or irritation, you are good to go.
Enjoying this DIY guide?
Join the Good News Monday newsletter for a weekly dose of positivity and unlock the Almost Zero Waste Hub — a growing collection of eco-friendly resources & exclusive content, including my free Green Beauty e-book with my favorite DIYs. 🌞

Other non-greasy oils
There are many great non-greasy carrier oils. They all have different characteristics and benefits. Light, fast-absorbing oils that you can consider include:
- Grapeseed oil – One of the least greasy, light, and fast-absorbing carrier oils. It penetrates the skin very quickly, leaving the skin with a smooth, matte finish. Suitable for all skin types, including oily skin. Comedogenic rating – 1.
- Camellia seed oil – Lightweight and silky, it penetrates the skin fast. Suitable for all skin types. Comedogenic rating – 1.
- Rosehip oil – Fast-absorbing, and it may help with stretch marks and acne. Great for dry & mature skin. Comedogenic rating – 1.
- Apricot kernel oil – Fast absorption, antifungal, antibacterial, anti-inflammatory. It also promotes wound healing. Suitable for all skin types, especially oily and combination skin. Comedogenic rating – 2.
- Sunflower oil – Highly absorbent and great for acne-prone, dry, normal, and oily skin. Comedogenic rating – 0-2.
Non-greasy whipped body butter recipe
Materials:
- A bowl
- A pot
- Clean jars (sterilize jars in boiling water for 10 minutes)
- Silicone whisk
Ingredients:
- ¼ cup shea butter (54g)
- ⅛ cup safflower oil (30 ml)
- 1 tbsp cocoa butter (13g)
- 1 ½ or 2 tbsp tapioca starch (~10g or 15g) – I added 2 tbsp
- 1 tbsp kaolin clay (~7g)
- 30 drops of vanilla fragrance oil (or other essential oil)
Instructions:
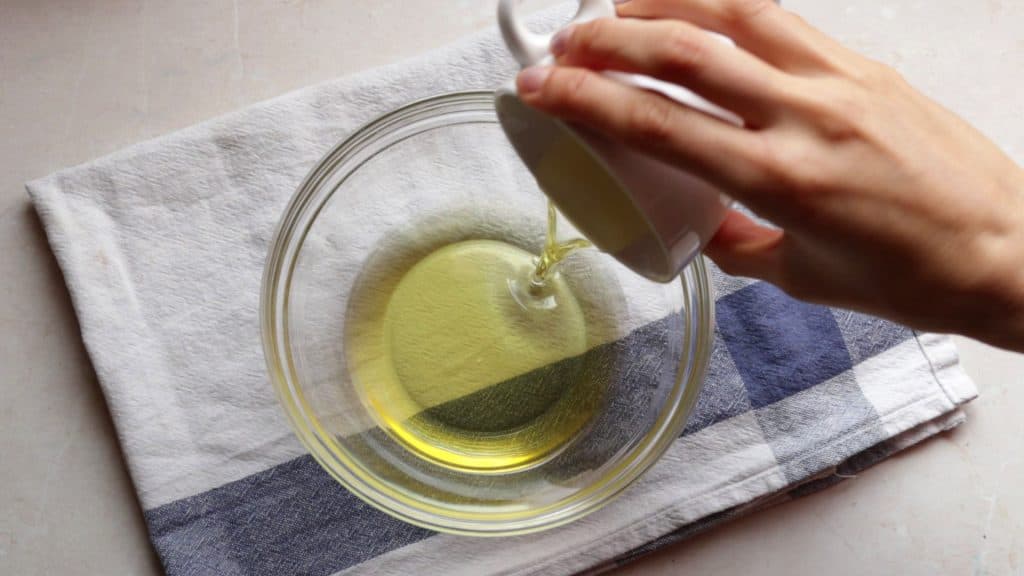
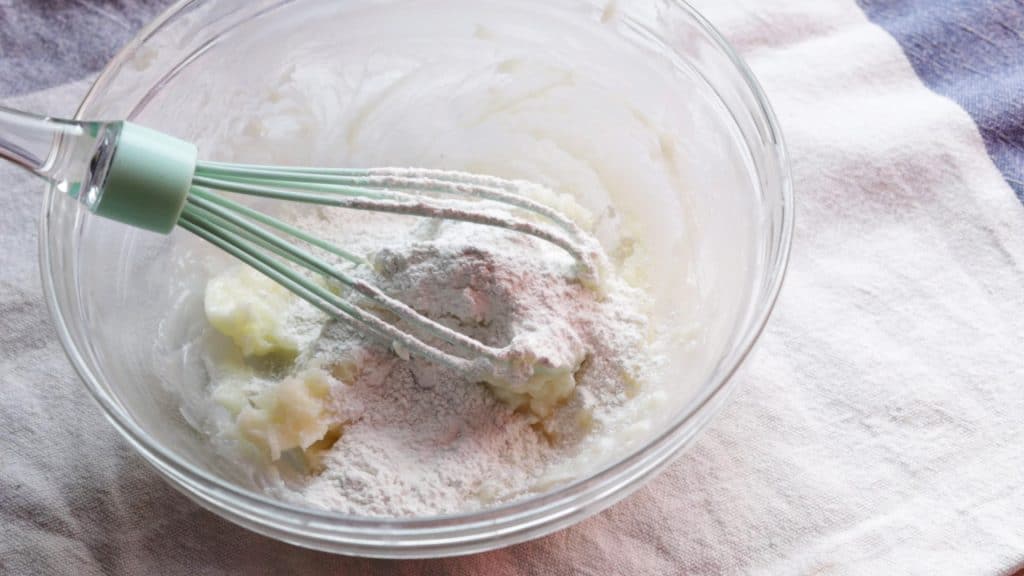
1. Melt shea & cocoa butter in a bowl in a double boiler.


2. Once melted, take off the heat. Add the safflower oil, and mix well.
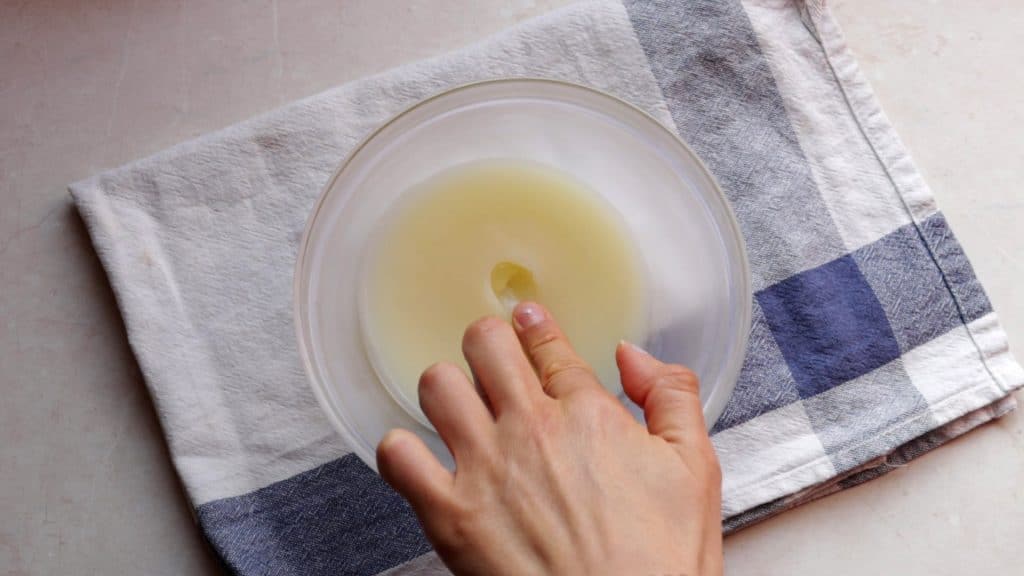
3. Put it in the fridge (or freezer) for about 15-25 minutes. While you wait, mix the dry ingredients (kaolin clay & tapioca starch) in a bowl, with non-metallic utensils.
4. Once it gets slightly solid, take it out of the freezer, and start mixing with a hand mixer or a silicone whisk*.

5. While mixing, add the essential oil, and then gradually the combined dry ingredients (tapioca starch and kaolin clay).

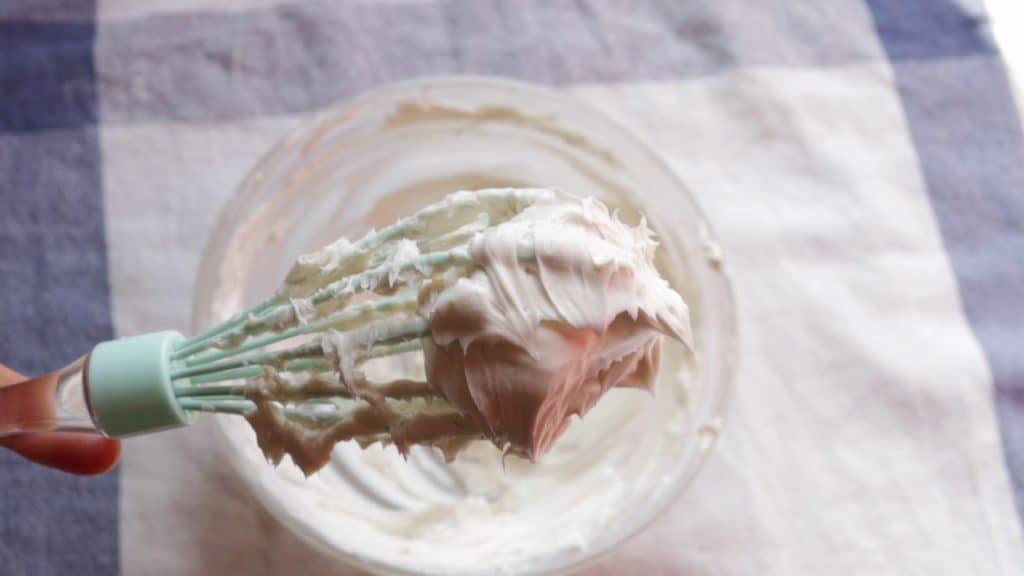
6. Keep mixing with a silicone whisk until it is thoroughly combined and the cream gets a buttery consistency. It will take 5-10 minutes.
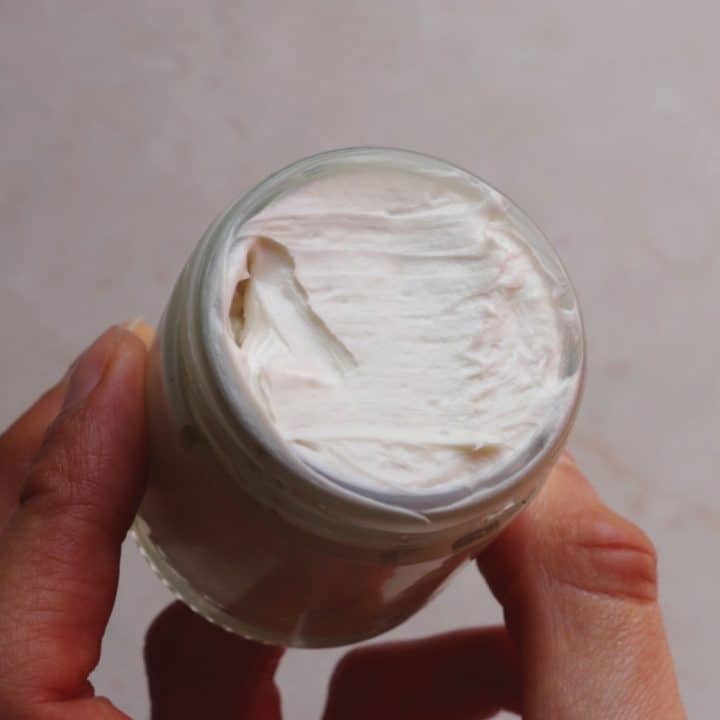
7. Transfer to sterilized jars. (See notes for details)

Notes:
- To reuse jars, you have first to sterilize them. Place upcycled jars in boiling water for about 10 minutes. Let air dry thoroughly before filling with body butter.
- The body butter may lose some of its airiness over time. If it happens, you can whip it again by hand or just use it the way it is.
- You shouldn’t use metal utensils, or bowls, due to the clay. Clay reacts with metals and becomes less effective. Use glass, wooden silicone, or ceramic utensils/bowls.
- With this amount, you will fill about one small jar. To get more, double the amount of the ingredients.
DIY Whipped Body Butter Recipe (Non-Greasy)
Deliciously-smelling homemade whipped body butter that isn’t greasy at all!
Ingredients
- ¼ cup shea butter (54g)
- ⅛ cup safflower oil (30 ml)
- 1 tbsp cocoa butter (13g)
- 1 ½ or 2 tbsp tapioca starch (10g or 15g)*
- 1 tbsp kaolin clay (~7g)
- 30 drops of vanilla fragrance oil
Instructions
- Melt shea & cocoa butter in a bowl in a double boiler.
- Once melted, take off the heat. Add the safflower oil, and mix well.
- Put it in the fridge (or freezer) for about 15-25 minutes. While you wait, mix the dry ingredients (kaolin clay & tapioca starch) in a bowl, with non-metallic utensils.
- Once the butters get slightly solid, take it out of the freezer, and start mixing with a hand mixer or a silicone whisk* until it is thoroughly combined and with a creamy consistency.
- While mixing, add the vanilla fragrance oil, and then gradually add the dry ingredients (tapioca starch and kaolin clay).
- Keep mixing with a silicone whisk until the cream gets a buttery consistency. It will take 5-10 minutes.
- Transfer to sterilized jars. (See notes for details)
Notes
Where to get the materials (plastic-free)
- Silicone whisk – Use non-metallic utensils because kaolin clay reacts with metals.
- Jars – You can upcycle old jars. Just make sure to sterilize them.
- Kaolin clay – Buy online in bulk, or look locally.
- Cocoa butter – From Real Plastic Free (UK) Etsy (US & International), Zero Waste Bulk (US), Byo Long Beach (US), or The Green Jar (Canada), Replenish Refill (Australia).
- Tapioca starch – Amazon (box packaging, but it might be with plastic inside) or from Zero Waste Bulk. Check locally for plastic-free options (in paper/bulk).
- Shea butter
- Safflower oil
- Vanilla fragrance oil

You can use more or less the same ingredients to make a solid & non-greasy lotion bar, too! If you are interested in learning how to do it, you can follow my step-by-step guide here.
FAQ
Does the homemade body butter need a preservative?
No – this whipped shea butter recipe needs only oils, butter, and starch, so there is no need to add a preservative. In addition, it has a long shelf life due to the absence of water or other liquids.
How long will the DIY body butter last?
The non-greasy body butter can last between 1-2 years. Just make sure to keep it in a cool place out of direct sunlight.
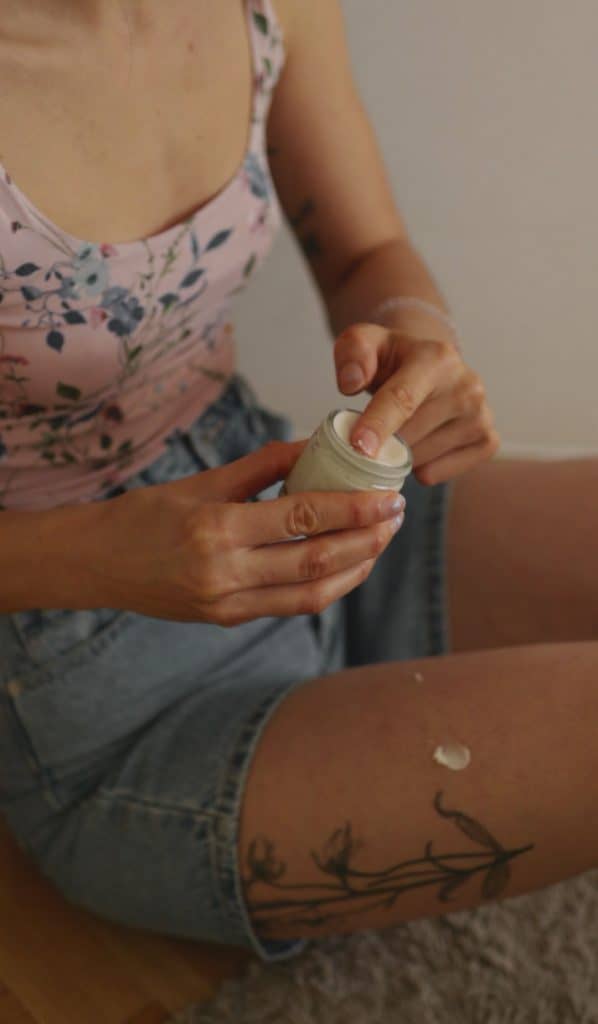
Additionally, always wash & dry your hands before scooping the body butter to avoid adding bacteria to the jar.
How to make it less greasy?
- Use fast-absorbing oils like grapeseed oil, sunflower oil, safflower oil, rosehip oil, apricot kernel oil.
- Avoid using more greasy oils that don’t absorb into the skin well, such as – castor oil, olive oil, palm oil, and coconut oil.
- Add natural ingredients that absorb oil, such as arrowroot powder, tapioca starch, cornstarch, and clay.
Why does the DIY body butter feel grainy?
Through my research, I found that sometimes, the body butter becomes grainy. This can happen IF:
- You heat the shea butter above its melting temperature – Melt it over low heat for at least 10 minutes. You can also melt the other ingredients first and add the shea butter at the end.
- The melted shea butter is cooled down too slowly – Pour the melted shea butter into a bowl and place it in the freezer or refrigerator, or over an ice bath, to cool down fast.
- You use unrefined shea butter – Use refined to avoid a grainy feeling in the end product.
How to soften it if it’s too hard (or harden it if it’s too soft)?
If you use any alternative ingredients or live in a very cold/warm climate, you might get a body butter that’s softer or harder.
If your body butter ends up being too hard: Increase the amount of liquid oil or add less cocoa butter.
If your body butter ends up being too soft: Do the opposite – decrease the amount of liquid oil or add more cocoa butter.
You can remelt it (on low heat, since most essential oils are heat sensitive) and make your changes as needed. Then, go once again through the cooling and whipping process.
If you feel that the body butter has lost its scent during the remelting process, add a few extra drops of essential oil.
Will it melt in hot weather?
If it’s too hot, yes, it will. The melting point of body butter is somewhere around body temperature, which is about 37 degrees Celsius (it can be slightly higher or lower).
If where you live, the temperature is higher, then it most likely will melt. In that case, you can keep the body butter in the fridge.
How to keep the whipped shea butter from hardening?
Depending on the temperature of where you live or where you store it, your body butter could lose volume, and in a cooler climate, it could stiffen up.
If the fluffy consistency of the homemade body butter hardens in a couple of days, it can make it harder to apply. To keep it soft and fluffy, add a little bit of jojoba oil to the whipped shea (less than 10% of the mixture).
Can you use it on your face?
You can use it on your face only if your recipe contains NO comedogenic ingredients (butter or oil that can clog the pores and cause breakouts). Anything higher than 2 is not recommendable.
For example, cocoa butter and coconut butter comedogenic ratings are 4. Shea butter and safflower oil comedogenic ratings are 0. (find a list with most oils and their ratings) Nevertheless, you can give it a try and see how it feels. Just don’t put a thick layer.
Summary
All in all, making homemade non-greasy whipped body butter is super simple, and I’m sure you’ll love it.
Even if you don’t have the exact measurements for the recipe, you can experiment and do your version!
The essential things to remember are:
- It is a super good and affordable way to hydrate and nourish your skin
- It is easy to make and it is customizable
- The body butter doesn’t need a preservative, and it can last you 1-2 years
- It is a neat gift for friends & family members
- It is easy to make it less oily by adding fast-absorbing oils and ingredients that naturally absorb oil
- Keep in mind that it will melt if it’s too hot outside
- You can use it on the face, but it might be too heavy
Will you give this non-greasy DIY body butter a try?
Let me know in the comments below!


Can I make this without the clay ?
Hey Emma, yeah, you can skip the clay. 🙂
There is no such thing as vanilla essential oil. It makes this seem not legit
Noted, I meant vanilla fragrance oil. Thanks for pointing that out!
How do I make this for a gallon ?
Hey! In Europe, we use different metric systems so I’m really not sure, sorry.
Thank you so much for all the helpful information, I wanted to let you know that you miswrote sunflower oil in a part of the article, confused me a bit late last night when reading.
Hey Bill, thank you for letting me know, I’ll take a look! And in case you mean ‘safflower’, it isn’t misspelled, it is a different type of oil. 🙂
This did not turn out! I did everything. the recipe called for. I am so disappointed. This was my third time making this! I really thought I had the recipe.
The body butter was hard and clumpy. I read this entire article after I made the 3rd batch, I added a couple id droplets of Camellia and a little bit of grapeseed oil
It still greasy but it’s not hard anymore
Hey Angela. I’m so sorry that it didn’t work out. I know my mum had the same issue – it was harder and clumpy. I think it could be because:
1) You left the mixture to harden too much and/or 2) The powder ingredients weren’t mixed well/had clumps.
Maybe you can try to take it out from the fridge before getting too hard, and you can use a sifter to add the dry ingredients gradually. It should help separate and break up clumps and make it easier to combine everything.
Hi! If I don’t have any kaolin powder, do I add another 1 Tbsp. of Tapioca starch to make up the difference? (3 Tbsp. of Tapioca starch instead of 2?) Thanks!
Hey. No need to add more tapioca. 🙂
Can I use arrow root powder in place of tapioca starch, and if so, is it the same measurement amount? Also, if leaving out the kaolin clay, how does this effect the consistency?
You can use arrowroot, yes! And since the clay is just a little bit, removing it completely won’t really affect the consistency. 🙂
Wow this was great! Especially like the idea of using kaolin clay, will it be alright to use pink kaolin clay?
http://www.Gracefullyelegant.com
Hello, I added fresh aloe vera gel to the mix. It was so creamy and then the next morning the aloe vera started to separate. The butter started to have droplets
That’s because aloe is water based. You would have to emulsify in a blender slowly and then whip to make that work
In response to:
Hanan says:
February 20, 2023 at 9:33 pm
Hello, I added fresh aloe vera gel to the mix. It was so creamy and then the next morning the aloe vera started to separate. The butter started to have droplets.
My thought from some research I have been doing on making butter creams and hand sanitizers, is to consider using some “aloe vera butter” or I also found you can buy an “aloe vera oil”, but it is hard to find. I feel like you had issues possibly due to aloe “gel” not having the consistency needed to be able to add in to Merilin’s recipe.
I see you say don’t use metal utensils but how does it also say a hand mixer is okay to use. Unless I’m missing something I don’t think hand mixers come with silicone beaters. You also have a picture of a silicone whisk and a metal whisk. Maybe you could clarify? Thank you!
Hey April, that’s a good point; I didn’t thought about this actually. I’ll do it with a silicone whisk only in that case, because of the clay. 🙂
Can you include a measurement estimate of how many ounces or other form of measurement this makes. Small jar is a wide range and widely variable. If making for gifts an idea would be helpful for sourcing jars in advance.
Thank you for your comment! That’s a good point. This recipe yields approximately 4 ounces (113g) of whipped body butter. If you’re planning to use jars for gifting, small 4-ounce jars work perfectly. If you want to divide it into smaller containers, you could use two 2-ounce jars or several 1-ounce jars for sampler-style gifts. I hope that helps.😊